- Home
- Plumbing tips
- How to replace copper pipe with pex
Upgrade Your Plumbing: How to Replace Copper Pipe with PEX the Right Way
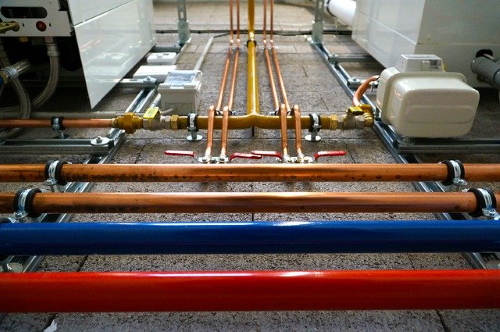
 PEX pipes and connectors (photo: amazon.com)
If you're considering a partial or complete plumbing upgrade for your home, you may have wondered: how do you replace copper pipes with PEX?
As home improvement evolves, PEX (cross-linked polyethylene) is emerging as a favored choice over traditional copper for various compelling reasons.
In this guide, we'll explain why many are switching to PEX, highlight its benefits, and give you a step-by-step guide to making the change.
Whether you're a seasoned DIY enthusiast or a homeowner looking for insights, this guide aims to equip you with the knowledge and confidence to change the pipes properly.
The most common reasons homeowners decide to replace copper pipe with PEX
 Soldering a copper pipe (photo: pixabay)
There are several problems associated with copper plumbing that might influence a homeowner to consider switching to PEX.
Here are several important reasons why you want to consider the change:
- Corrosion and pinhole leaks: Over time, copper can corrode, especially if the water it transports is acidic. This corrosion can lead to pinhole leaks, which are small holes that develop in the pipe. These leaks can cause water damage to a home and require patching or replacement of the affected pipe section. Regular occurrences can be expensive and disruptive.
- Cost: Copper has become more expensive over the years. Installing copper plumbing can be costlier not just because of the material costs but also because of the more labor-intensive installation process, which requires soldering and more fittings. PEX, on the other hand, is generally cheaper both in terms of material and labor.
- Flexibility: Copper pipes are rigid. Any turn or adjustment in the pipe's path requires a joint or fitting. These multiple joints can be potential points of failure in the future. PEX, being flexible, can curve around obstacles without needing as many fittings, reducing potential weak points in the plumbing system.
- Cold weather vulnerability: In areas prone to freezing temperatures, copper pipes can burst if the water inside them freezes and expands. PEX is more resilient in such conditions, as it can expand and contract without bursting.
- Water noise: Water moving through copper pipes can sometimes be noisy, especially if the pipes are not adequately secured. PEX tends to dampen the sound of flowing water better, leading to quieter operation.
- Installation challenges: Copper plumbing installation requires a skill set involving cutting, fitting, and soldering. Mistakes can lead to leaks or weak points. PEX installation is more straightforward, with simple crimping or clamping techniques.
Related:
Copper vs. PEX: comparing pros and cons
Required tools and material
When replacing copper plumbing with PEX, you'll need a variety of tools and materials to ensure a smooth transition.
Here's a list of the essential items you'll require:
Tools:
- PEX crimping tool or cinch clamp tool: To secure PEX tubing onto fittings.
- Pipe cutter or PEX shears: For cutting tubing and removing old copper piping.
- Go/no-go gauge: To ensure that crimp connections are done correctly.
- PEX uncoiling tool: Helps in unrolling plastic pipes from coils without kinks or twists (useful for larger jobs).
- Expander tool: Used if you're opting for the expansion fitting method.
- Tubing cutter: For cleanly cutting copper and PEX tubing.
- Adjustable wrench: To tighten fittings and remove old fixtures.
- PEX bend supports: Helps to make 90-degree turns with PEX without the need for elbows.
- PEX stiffeners: Needed for insert into the end of the PEX tubing when using push-fit connectors or certain types of crimp fittings.
Materials:
- PEX tubing
- Fittings
- Crimp rings or cinch clamps
- Manifolds
- Transition fittings
- Support clamps or suspension clips
- Teflon tape or thread sealant
- Pipe insulation
Step-by-step instructions on how to replace copper pipe with PEX
Here's a detailed explanation of the procedure to make this switch, ensuring you're well-equipped with the knowledge and steps required for a seamless transformation.
- Before beginning any work, it's crucial to assess the current copper plumbing system. Start by inspecting the overall condition of the pipes, checking for visible signs of wear, corrosion, or leaks. Determine which parts need replacement or if a full overhaul is necessary.
- Gather materials and tools: PEX tubing, fittings, crimping tool or cinch clamps, pipe cutter or PEX shears, and other materials.
- Turn off the water: Ensure the main water supply is turned off to prevent any water flow.
- Drain the system: Open faucets and valves to let any remaining water out of the copper pipes.
- Cut and remove: Using a pipe cutter, cut out the sections of the copper piping that you wish to replace. Make sure to be careful around any connections to fixtures or appliances.
- Measure and cut: Measure the length of PEX tubing you'll need to reach from one fitting to another and cut accordingly. Remember, one advantage of PEX is its flexibility, so it doesn't require as many fittings as copper would.
- Insert fittings: Insert the appropriate fittings into the cut ends of the PEX tubing. These can be brass or plastic and might include elbows, tees, or straight connectors.
- Secure the PEX: Using a crimping tool, secure the PEX tubing to the fittings. Ensure that the connection is tight to prevent leaks. Inspect the connection for uniform compression and use a "go/no-go" gauge to verify the crimp's integrity, ensuring a leak-free connection.
- Use transition fittings: If the entire plumbing system isn't being replaced, you'll need transition fittings to connect your new PEX tubing to the existing copper pipes. These fittings, often made of brass or a combination of brass and plastic, feature a barbed end for the PEX and a sweat or threaded end for the copper connection. By crimping the PEX side with a crimp ring and soldering or threading the copper side, they provide a robust, leak-free bridge between the two different materials, ensuring durability and a seamless flow within the system.
- Turn the water back on: Once everything is installed, slowly turn the water back on to check for any leaks in the new connections.
- Inspect connections: Check each PEX connection to ensure no water is escaping. If there are any issues, turn off the water, drain the system, and make the necessary adjustments.
- Secure PEX in place: Use clamps or supports to secure the PEX tubing in place, ensuring it doesn't move around or sag. Typically, PEX should be supported at least every 32 inches when running horizontally.
- Insulate if necessary: If the PEX will be exposed to exterior walls where freezing might be a concern, insulate the pipes.
Conclusion
Understanding the correct procedure for replacing copper pipes with PEX is essential to ensure the longevity, efficiency, and reliability of your home's water flow.
This guide offers a comprehensive overview of the steps necessary to complete the replacement correctly, aiming to arm homeowners with the confidence and knowledge they require.
Always ensure that any modifications made adhere to local regulations and best practices, guaranteeing the safety and optimal functionality of your plumbing system.
FAQ
Why would I want to replace copper pipes with PEX?
Why would I want to replace copper pipes with PEX?
PEX has several advantages over copper. It's generally more cost-effective, flexible, resistant to scale and chlorine, doesn't corrode or develop pinhole leaks, and has fewer joints, which can reduce the chance of leaks.
Can I mix PEX with existing copper pipes in my home?
Can I mix PEX with existing copper pipes in my home?
Yes, PEX can be integrated with existing copper plumbing using appropriate fittings. Transition fittings are made explicitly for connecting PEX to copper, ensuring a seamless integration between the two materials.
Are there any potential health concerns when using PEX instead of copper?
Are there any potential health concerns when using PEX instead of copper?
Both PEX and copper piping have been certified safe for potable (drinking) water by leading standards agencies. However, as with any plumbing material, it's essential to ensure proper installation and adherence to local regulations. PEX does have some limitations regarding exposure to UV light, so it should not be used in applications where it will be exposed to direct sunlight.
You might like these
Comparing Copper vs. PEX Plumbing: Which is Better for Water Heating?
Compare copper vs. PEX for water heating. Benefits of replacing copper with PEX. Tips for transitioning to PEX. Choose the best option for your home.
Tools Used in Plumbing and Water Heating: Tips for Homeowners
Explore the list of the necessary tools used in plumbing and water heating every plumber and homeowner should have for the successful installation and repairs.
Plumbing Tips for Freezing Weather: DIY Prevention and Maintenance
Essential plumbing tips for freezing weather. Protect your water heating system, prevent frozen pipes, spot common signs, and how to thaw them quickly.


- Home
- Plumbing tips
- How to replace copper pipe with pex
You might like these
Exploring the Benefits of PEX Plumbing: Why It's a Smart Choice
Homeowners can enjoy many benefits of PEX plumbing, which offers a durable and cost-effective solution for their plumbing projects, making it a smart investment in the long term.
Comprehensive Guide to Copper Plumbing Leak Repair Solutions
Discover 8 expert techniques for copper plumbing leak repair, from soldering to utilizing compression fittings and hose clamps for efficient, durable fixes to your pipes.
DIY Plumbing Tips for Homeowners: A Beginners' Guide to Plumbing
Essential water heating and DIY plumbing tips every homeowner should know. Explore the tools you need, learn how to repair and maintain your plumbing and water heating system.


About the author
Zeljko M. is a mechanical engineer who is passionate about everything HVAC. He has worked as a technical support engineer and sales manager in the water heating industry on various brands including Beretta, Junkers, Vaillant, and others. He has created this blog to share his knowledge and experience on water heaters and to provide valuable insights and advice to homeowners, DIYers, and anyone interested in this field.
Copyright. All rights reserved
Disclaimer: The content published on hotwatertalk.com is not professional advice. You should consult with a licensed professional and check local permit requirements before starting any project.
Hotwatertalk.com is a participant in the Amazon Services LLC Associates Program and other affiliate advertising programs, designed to provide a means for us to earn fees by linking to the affiliated sites